Wednesday, December 20, 2017

easy make-ahead breakfast casserole


Every year, beginning in October or so, I start thinking about possible Christmas gifts for my friends. I look through endless cookbooks for cookies, breads, or candies, I Google, I invent ideas, and then I finally land on something.  It's a fun process, but I really want the end result to be enjoyed, useful, and - of course - straight from the kitchen.  

This year, I thought about what could be tasty AND helpful, and I came up with the idea of gifting a breakfast casserole.  I had in mind several of the recipients who were hosting their in-laws, their college kids, or just their own immediate families, and I thought it might be neat to have a frozen, ready-to-thaw-and-bake breakfast on hand.  At least it would be one meal taken care of for them. For a few, I paired the casserole with the cinnamon swirl bread from my last post, and for others, I par-baked and froze these cinnamon rolls.  All of them I tied off with a small bag of flavored coffee.  

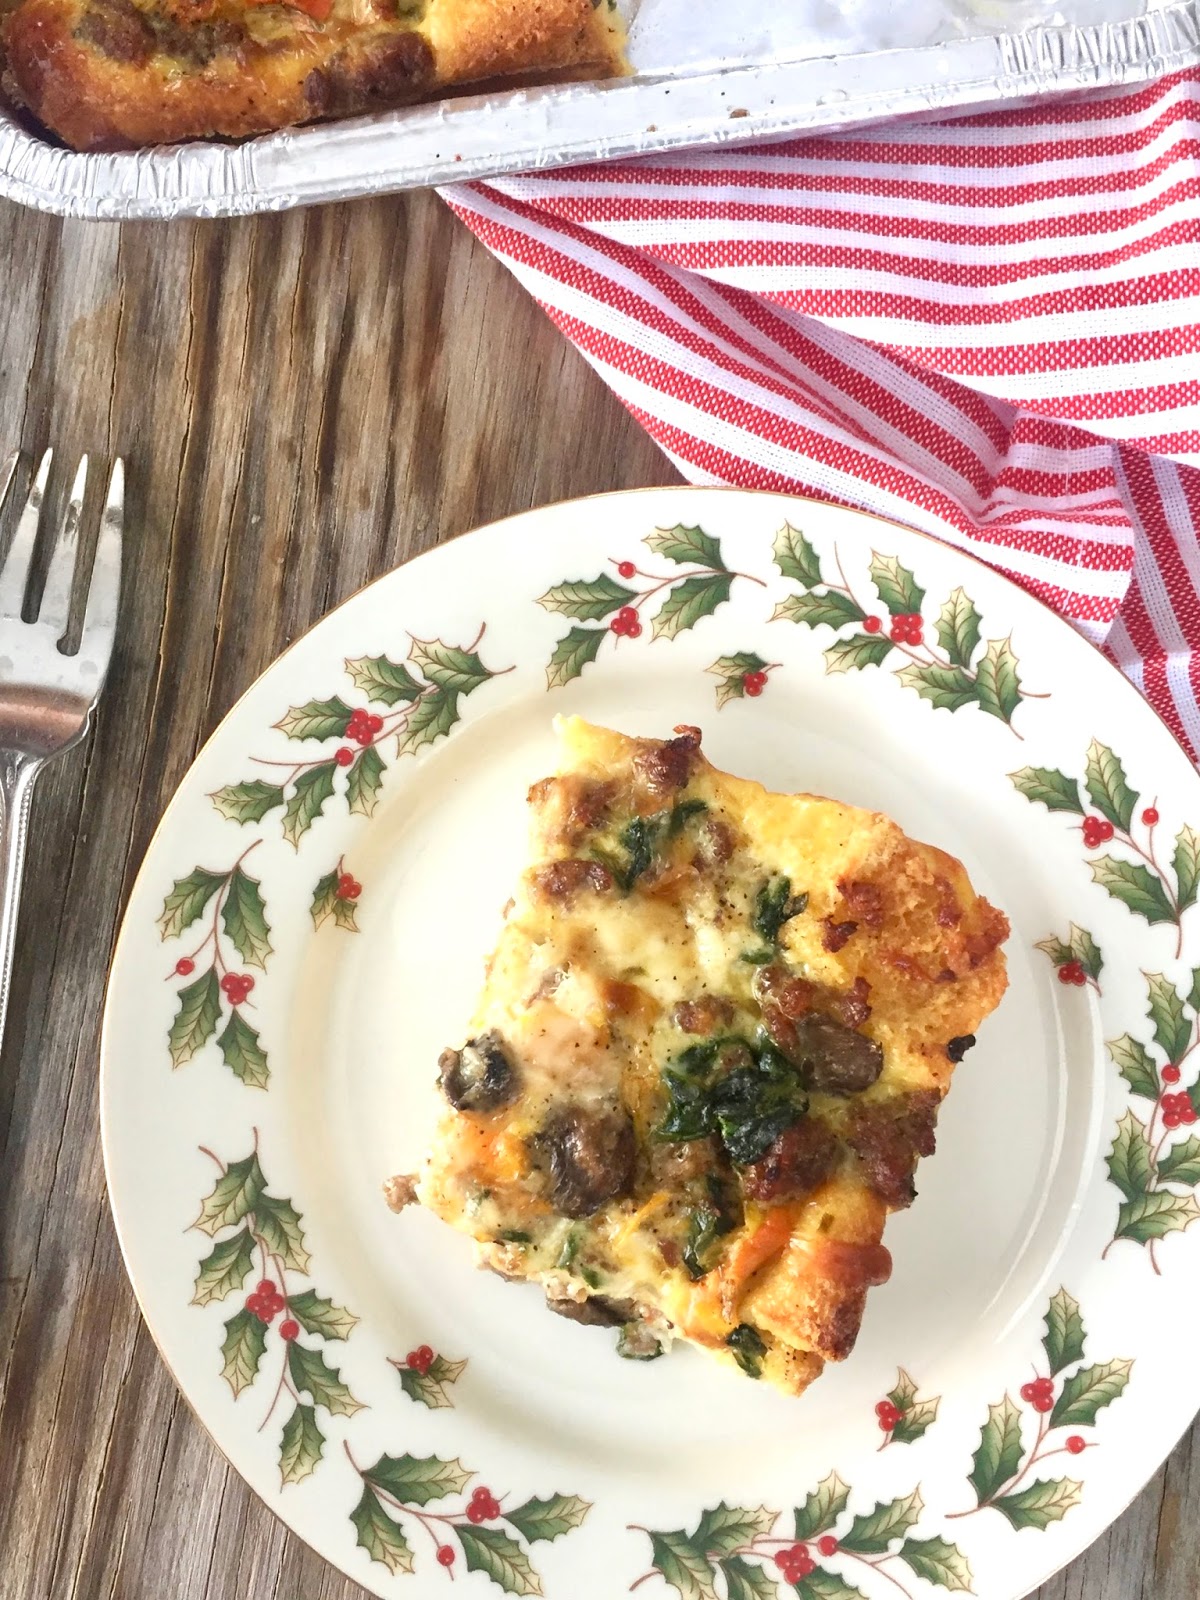
I have to say this casserole is one of the tastiest I've ever had.  The array of vegetables absolutely makes it and the ability to adjust and customize to one's liking is its best feature!  For the casseroles I gave away, I did a combination of breads for the bottom layer - sourdough, country white, and whole wheat.  For ours here at home, I used this sandwich bread, which I've been using for the last few months as I watch my carb intake.  The bread could easily be left out or replaced with some kind of potato, if desired.  To gift, I made the casserole in an aluminum pan through the last step before baking, wrapped in plastic wrap and then foil, and then froze it completely over night.  I provided the instructions on how to thaw and bake when I delivered the final product.  

If you are needing an idea for breakfast, brunch, or even a dinner over the next couple of weeks, I think you will find this recipe a winner.  You can sub and adjust to your heart's desire... any kind of protein, bread or vegetable, it's your choice!  And I love options, don't you?  But more than anything, I love great flavor.  Bon appetit!  

Easy Make-Ahead Breakfast Casserole

makes one 9x13 or two 8x8 pans

  • 3/4 lb uncooked sausage, casings removed (or meat of choice)
  • 1 tsp dried rosemary (optional)
  • 2 bell peppers, diced ( I used yellow, orange and red)
  • 1/2 medium onion, diced
  • 1 tsp minced garlic
  • 1 cup sliced mushrooms
  • 1 cup fresh spinach
  • salt and fresh ground pepper
  • 4 slices day-old bread of choice, cubed (you can put in 400 degree oven for a few minutes, if needing it quickly)
  • 10 large eggs
  • 1/2 cup milk (I used whole, but any milk will work)
  • 1/2 cup shredded cheese (again, choose your favorite, but I used pepper jack 
1. Cook sausage (and rosemary, if using) until fully browned.

2. Once some fat has been rendered from the sausage, pour a couple of tablespoons in a separate pan and cook the onions and peppers until tender, about 7-10 minutes while sausage finishes cooking.  

3. Add in garlic and mushrooms and cook a couple of minutes before adding spinach.  Cook briefly until spinach just wilts. 

4. Pour vegetables and sausage into large bowl and thoroughly combine, adding salt and pepper to taste.

5. Place bread in bottom of pan/s coated with butter.  

6. Beat eggs, milk and 1/4 cup of the cheese until well blended.  Pour half of the mixture over the layer of bread.

7. Layer the sausage/vegetable mixture over the eggs and pour remaining egg mixture over that.  

8. Finish with the remaining cheese and another sprinkling of salt and pepper.  

9. If freezing, wrap in plastic and then foil and place in the freezer for up to three months.  When ready to use, thaw in fridge overnight, bring to room temperature and cook at 375 degrees for 40-45 minutes, or until good and browned and center is set.

10. If using next day, cover casserole and place in fridge several hours, or overnight.  Bring to room temperature, and cook at 375 degrees for 40-45 minutes, or until good and browned and center is set.

11. Cool for 10 minutes, slice and serve.

Recipe from Sally's Baking Addiction


Sunday, December 17, 2017

welcome home ~ christmas version


Keeping up with the Joneses...  What's trending now...   Living that life would totally wear me out. I can fully and completely admire what someone else has done with their place, but it's not my motivation for what we "have" to do with ours.  Instead, I want to feel warm and at ease in my space, and that may or not look like the Pinterest prize or Insta image of all time.  More than likely, it doesn't.  And it is so, so hard to accept that for so many of us.  Me included.  

At the end of the day, I want our home to hug us when we walk in, and I - more than anything - want others to feel the same way.     

A favorite author of mine has within her some marvelous quotes.  Shauna Niequist in The Power of the Living Room and Present Over Perfect says,


"The heart of hospitality is when people leave your home they should feel better about themselves, not better about you."

Wow.  Now that should be our motivator.


Keeping that in mind, this year, I totally embraced decorating our front porch.  I didn't scour the internet for the top hits for decorating (although that can be so fun sometimes!).  I just wanted to do something that encouraged a smile or that "hug" for those who walk by.  I wanted to make it in such a way that when the front wheels of our car hit the driveway in the evening, I couldn't help but smile.  I really wanted to pull together a few things that said nothing more than, "Welcome. You. Are. Home."  My favorite place.


For us, it's a happy sight in the day, and in the evening, it is cozy and slightly illuminated, with a soft spotlight from the yard and a simple strand of white lights around the doorframe.  There isn't a single thing up there purchased within the last several years.  The garland and wreaths we've had forever.  The hall tree we purchased from Big Lots about 15 years ago - it was once cream and I painted it shortly after we moved to this house.  The dry sink is one of my favorite finds from a tiny roadside junk store in Southern Indiana about seven or eight years ago.  John chopped a bunch of wood from trees we removed a while back, so that's been fun to see the sink full of nature.  We got the sled last year from John's home... a really sweet reminder of his childhood.  And speaking of childhood, the chalkboard was part of the boys' art easel they had as little ones.  Could cry now, thinking about them standing at it as two- and four-year-olds.   


I don't want to see this season move too fast.  When I am feeling the desire to decorate, I definitely find I desire it most this time of year.  It's just comfy.  Wood and greenery have been our favorites since we married, and that's always easy during Winter months.  But I also want this season to move a bit slower so we can.  In a way, these next few weeks force us to sit more closely, a little longer, even a little quieter.  I want to be in others' homes and them in ours.  I want to feel welcome and I long to welcome others.  So, I encourage all of us:  Don't just keep up with the Jones's.  Invite the Jones's.  And rather than putting all of our energy in being like everyone else, and then posting about it, let's do everything we can to ensure those we do host feel really good about themselves when they leave our homes.  In the end, that's bound to swell our own hearts in return, and way more than 1,000 likes ever could.

Happy Hosting,
Jen 


Thursday, December 14, 2017

cinnamon swirl bread


One of my favorite activities of the year is our youth group's annual baking party. We have a fantastic and supportive congregation who encourages and contributes so much to our group.  A few years ago, we decided to say "Thank you!" through a holiday baking marathon.

In theory it sounded like a breeze until a pretty good-sized group of teenagers showed up all at once, eager to roll up their sleeves and get cooking.  Only then did I realize I really should have had a plan.

We began measuring, pouring, cracking and whisking all kinds of craziness together to try to bake every family in our congregation a loaf of bread - about 150 total.  Several hours (and a bajillion trips up and down the stairs with trays of loaf pans going into the ovens on two different floors) later, we actually had loaves that resembled pumpkin cranberry bread.  Honestly, they were pretty good, but let's just say they all had their own "unique" style.


Over the years we have gotten a little better as we've kept up the tradition, but this year we decided to try a different bread.  I had baked Cinnamon Swirl Bread a handful of times and thought it might be a good one to do. The buttermilk makes it incredibly tender, the house smells unbelievable as it bakes, and a little cinnamon-sugar caramelization on top of anything is never a bad thing.

If you're wanting a good sweet bread to gift to someone this season, I encourage you to try this. The recipe will make one regular-sized loaf or three mini loaves.  Enjoy!

Cinnamon Swirl Bread

makes one 9x5 loaf or three mini loaves
  • 1 cup sugar, divided
  • 1 tbsp cinnamon
  • 2 cups all-purpose flour
  • 1 tsp baking soda
  • 1/2 tsp salt
  • 1 egg
  • 1 cup buttermilk
  • 1/4 cup vegetable oil
1. Preheat oven to 350 degrees, and spray and flour baking pan (or three mini pans, if using).  

2. Mix 1/2 cup sugar and cinnamon together in small bowl.  Set aside.

2. In a medium bowl, whisk together the flour, baking soda, salt and remaining 1/2 cup sugar.  

3. In a separate bowl, mix together egg, buttermilk and vegetable oil.  

4. Add wet ingredients to dry ingredients, mixing just until combined.

5. Put half of the batter in the pan. Batter is a bit thick, and I have found that an ice cream scoop works well here.  With the back of a spoon, spread batter to cover bottom evenly.

6. Sprinkle enough cinnamon-sugar mixture over the top of the batter to cover it well.

7. Spread the last of the batter over the cinnamon-sugar layer, smoothing to edges again.  Cover with more cinnamon-sugar mixture.  Save any cinnamon-sugar mixture left for another use.

8. Place knife in batter and swirl through the batter twisting and turning as you move through.  Again, it's thicker batter, so it will not be ultra-smooth.  Use the tip of your knife to "poke" the batter to an even thickness.

9. If cooking a large loaf, bake for 50-55 minutes.  If doing mini loaves, check at 35 minutes, and bake until top is set and toothpick comes out clean.

Recipe adapted from Taste of Home. 


Sunday, December 10, 2017

the lazy daisy creates ~ don't throw away that sweater!


Nearly twenty years ago, I purchased a great wool'ish sweater at a second-hand shop and wore it like crazy.  Stretched out, with a couple of tiny holes, it has made its way into a throw-away pile more than once, but I kept pulling it back out thinking there surely would be something I could use it for. The color and feel of it always made me think about our house in the colder months, and its warm, nubby ribbing convinced me to hold onto it.


Enter the Green's Holiday Decorating Season 2017, and I pulled out these great old, heavy (and kind of large) candle holders I bought about as many years ago as the sweater.  I've used them for other things besides candle holders, but this year I wanted to use them for their intended purpose. The only thing is that they're pretty large bases for the size candles I have, and the larger candles I already had in the closet were in glass containers and were red.  They looked OK on the stands on our mantel as they were, but I really wanted something more neutral and, well, wooly looking.

Wooly-looking... 

Ah!  My SWEATER!

Long story, short, I went digging through my mounds of old material scraps and found the sweater I had held onto for just a time as this.  I carefully cut the ribbing off the wrists and slipped them over the glass candle containers.  It was just what I had wanted in no time, flat!


I am super-excited to come up with a way to use the ribbing around the waist.  I could definitely see it fitting cozily around something and "fastening" it with some chunky wooden buttons.  My creative wheels are spinning, but in the meantime, I'm enjoying my "new" candles.  You never know what twenty years of waiting will bring you!